Thursday, March 31, 2011

Recipe: Blender Bread


I got this recipe a few years ago from Taste of Home.  They are so good - and so easy.  Def. a go to recipe!

You need:
1 cup milk
1 package dry yeast
1/4 cup sugar
2 eggs
1/4 cup veggie oil
3 1/4 cup flour
1 tsp salt


1. Heat up your milk - I put mine in the microwave on the drink setting. 

2. Combine warm milk, yeast, sugar, eggs, and oil in blender.

3. Blend.

4. In a large bowl combine flour and salt.

5. Add the blender mix.

6. Combine and let rise for 30 minutes.

{Look - your clean up is SOOO easy!!! No flour counters!}

7. Shape (originally I think these were made in cupcake pans to make rolls - but I was making buns) Rise 30 minutes. 

8. Bake at 350 for 18 - 20 minutes.

Make the rest of your dinner.

And ....

YUMMMM!!!

Linking up to these fabulous parties!

Sunday, March 27, 2011

Blanket Party

Gabe's Gifts
Hey guys!  It's the end of the month - which means blanket party time!   Don't forget each Monday you can see a special blanket tutorial at Today's Top 20, We're the Joneses, and This & That Creative

For anyone new - I've started a blanket drive this year to raise blankets for Project Linus.  Why?  To donate blankets in my son Gabe's name.  I lost our baby in August due to a miscarriage.  I really wanted something positive to be associated with his name.  And giving back is the best way to do that.

Project Linus is such a great organization.  They donate handmade blankets to kids (newborn - teens) who need them the most.  I'm really happy to be working with them.

I am so happy to say that I have recieved over 50 blankets for Project Linus.  WOW!  Thank you so much!!!  I really am just so greatful.  :)  Thank you thank you thank you.

  So link up any blanket project you've got.  Mail me your blankets to get donated.  Email if you are interested in guest posting a blanket tutorial (it will be seen at Today's Top 20, We're The Joneses and This & That Creative). 

Can't wait to see your projects!!

And don't forget the 31st is the Blogger of the Month Party at Today's Top 20.  Come link up your fave. project you've made in March for a chance to win a great prize from My Vinyl Designer as well as a month's of advertising at Today's Top 20!

Please go check out all of the awesome things that My Vinyl Designer has to offer!!  Right now they are offering 25% off every order until the end of April!  HOW AWESOME!

My Vinyl Designer Modern Art for the Home

Friday, March 25, 2011

My Shopping Round Up

Japan Relief - World Peace on Youth, Organic Cotton tshirt
I'd for sure get Josh this shirt -- I love the slogan "Wear the message....
From Afghanistan to Zimbabwe and countries in between, our wish for the World is PEACE."
Get it at RC Tees shop.  $18 and 25% of proceeds are going to Japan Earthquake Animal Rescue and Support.  Such a great cause!

Bike Tee children and toddlers sizes choose your size and colors
And I'd have to get this bike shirt from Caustic Threads too.  I love that you can pick and chose the colors! I like the grey but I'd have to take green ink (of course!) for Josh!  $14.

Easter Rubber Duck Soap
Aren't these soaps cute?  Pink Parchment Soaps has them for sale!  I'd chose the duck with the bunny ears! $6.00


Undies Purse in Vintage Polka Dot
How awesome is this little undies bag?  Luxford Street's shop is super cool {she has a lego purse too!}.  I'd buy this for my sister to put her pens and stuff in at school.  How funny! $22

Yoshi Nintendo Desk Clock
This clock would look great on Josh's desk!  {His Mario room is slowly getting done!}  CAE clocks has tons of games to chose from! $25

NEW Michael Miller Prom in Gray 1 yard
I'd take a yard of Michael Miller's Prom fabric.  I'd have to make something for my friend Katie.  Do you see that girl spiking the punch!? How funny! $8.50 at Hypernoodle2

Rainy Days and Mondays Yellow Umbrella Damask by Riley Blake 1 yard
And I'd have to get a yard of Rainy Days by Riley Blake!  $7.25 at Thread This Fabric.


Total: $101.75

How would you spend an extra $100?!


Tuesday, March 22, 2011

You know you take too many pictures when....

You know you take too many pictures when you say smile and.....
Do you see that his other hand is covering his face...just in case I got around that big hand?  :)

Or how about...you know you take too many pictures when you give your child their dinner plate and they look at you.  So you ask why aren't you eating?  Aren't you hungry?

Their response...

I was seeing if you were going to take a picture of my hot dog first. 

What about you?  How do you know if you take too many pictures?

Oh - kind of a hooray my shop is finally open - enter coupon3 for 15% off your final purchase!  Go check out my items here.  More will be added each day so be sure to check back!

Monday, March 21, 2011

Ballerina Blanket Tutorial

One great thing about blogging is meeting new friends.  Stephanie from Full of Great Ideas is such a sweet gal and super creative.  You def. have to check out her blog!  I love it!  And I love this blanket she made.  It's so super sweet!  Thanks for sharing today Stephanie!! :)

My daughter was invited to her best friend's 8th birthday party. Her friend is an amazing ballerina and my daughter really wanted to make her a blanket with a ballerina on it. I knew there was no way I could make a ballerina but I came up with an idea that I am very proud of and I think is absolutely beautiful.

I used the same technique as my personalized fleece blankets to make this. I purchased the large deep pink coral fleece blanket (double bed size) and 1yard of tulle. I had black felt, pink fleece, pink ribbon, Velcro circles and thread in light pink, deep pink (to match the blanket) and black on hand. Total cost $5 for the blanket (on clearance) and $6 for the tulle.

I started by printing off some images of a tutu and body form to be inspired from. I first cut out of black felt the bust of the body form, then the post and the feet. Make sure to prewash the felt because the color can transfer.
Once I was happy with the dress form, I used that as the shape to cut the bodysuit. I didn't want the top to be too low cut since this is a gift for an 8 year old girl so I made just a small 'v' shape. I used a wide light pink ribbon (same as the slippers) to make straps on the shoulder.

I decided to remove the black felt from behind the bodysuit so that it was quicker to sew. This is optional.
I placed all the pieces on the blanket to determine where I wanted the exactly. I then lightly glued the fabric down onto the blanket using a fabric glue that dries clear. I start with the black pieces first by pulling one side back and gluing it. This allows you to glue it down without having to move the entire piece.
 
Once this was drying, I started to work on the ballet slippers. For these I simply printed off a clip art image that was resized (approximately 7 1/2 long) to be in proportion to the bodysuit . I then cut out the shape of the slippers in light pink fleece and sewed a straight stitch over the inner lines to make it look like it had an opening for a foot.
 I ripped off the paper and did a tight zig-zag stitch over the straight stitch to create a bold accent line.
 
 
I cut two pieces of ribbon to the length I wanted to make the ties for the slippers (I lightly heated the ends of the ribbon so they would not fray). I glued the ribbons and slippers on the blanket.

I create the girl's name in a Word file using a font that I like. I print off the letters and then cut them out of the light pink fleece. I glue these down in the exact spot I wanted them.

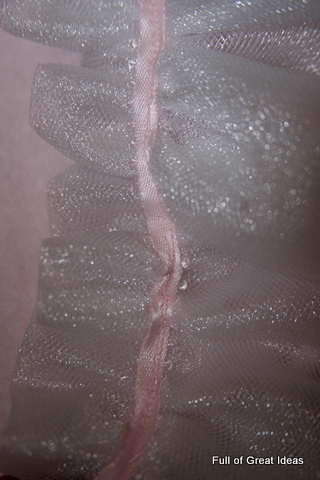
Next I focused on the tutu. I had 1 yard of tulle so I folded it in half length wise and did a basting stitch along the fold.
Pulling one tread from either end I gathered the tulle until it was the width of the waist of the dress. I then sewed a ribbon across the basting stitch to secure it.
Once the glue was dry, I did a zig-zag stitch around the dress form, name and the bodysuit. I always use the exact color of the blanket for the bobbin thread and match the upper thread with what I am sewing. I find this makes both the front and back of the blanket look nice.
(Back of fabric with matching thread.)
I attached the tutu to the dress with small Velcro circles. I thought it would be best that this could be removed for washing. Not 100% necessary but a nice to have.
One last look. Wow... I can't tell you how happy I am with this. Let's hope she loves it too :)

Told you!  Love it huh?  A-stinking-dorable.

Make sure to check out My Vinyl Designer for all your vinyl needs -- or just browse their massive project list for ideas!  You will find something you love! 


Thursday, March 17, 2011

Back. With Photos. With My Philosophy on life.

Alright.  I'm here.  Have no fear.  Computer issues.  But I've stayed busy!

A little late.  I know.  Josh's friend pulled off my tag that said Leprechaun Juice that was attached to my bottle (thanks kid) so it got moved to a shelf up high.  The luck letters I made the same as the LOVE.  {And for some reason they look really dark in this picture but they are a pretty clover green}.  The green candle holder I got at Kohls for $1.99!  {It has a Christmas tree scented candle in it but since I'm not lighting it anyways..} The dice I made for about $2.  And the picture frame has scrapbook paper in it.  It's cute.  Plaid.  With pots of gold. 


Tell me that the candle looks more St. Patrick's Day than Christmas!! I think so!  The dice worked for St. Patrick's Day.  But I actually made it for my vintage game theme.  And then I found these.


Aren't these cool?  I got them at Hobby Lobby.  {I LOOOOOOOVE Hobby Lobby}


One thing that I hate about living in an apartment is....white walls.  And our living room is tiny!  But I suppose if I had to chose between larger bedrooms and a small living room or the other way around I'd take it as is. 
I've got a few things in progress. 

Don't you love those colors?  I can't wait to show you it when it's all done!
**UPDATE: OCD Obsessive Crafting Disorder is giving some of these fabrics away!  Click here to enter**

I've been crafting.  Here's my short philosophy on life.  Opportunities are created not presented.  A friend and I were talking about that earlier today.  An opportunity is never given to you if you've not done anything to warrant it.  So I would like to stay at home.  I would like to craft.  I would like to blog.  And I would like to pay my bills (well, help pay them at least!) So I need to create the opportunity for that to happen. 

That means adding to my store, doing craft fairs, and keeping up with my blogging.  Goal: Add 1 thing to my store each day.  And blog each day. 

So stay tuned for those.  What opportunities are you creating for yourself?

Here are some things I've made to add to my shop.


Easter Shirt.  I love the plaid.  $12.95


Strawberry Shortcake Houndstooth Blanket.  The other side is a soft pink Minky.  It's just so girly.  I adore it.  $45

Anyone still there? :) I just have to showoff Josh's school. 
Isn't his school playground HUGE?  And this is just half of it.  On the other side there is a big boat the kids can get in and it rocks.  And the other side has swings, a smaller play ground, basketball goals and so forth.  It's seriously the coolest. 

Josh is on Spring Break so we've been hanging out. 
So there's my update.  I'll be back tomorrow!  I've got a few projects in my head I want to get done!  So be on the look out for tutorials! :)
Gosh it feels good to be back!