Tuesday, May 24, 2011

Car Seat Cover Tutorial

Here's Heidi!  I just love her blog Trying it Out!  And she's so sweet!  Make sure to stop by and tell her hello!!

I am Heidi and I blog over at trying it out. I used to be a junior high math teacher, until I had my first daughter, who is now four. I also have a 22 month old daughter and a pretty great husband (most the time anyway :) ). I love to create, but I am not creative. Fortunately I have the rest of the blogging world to inspire me, and I often use their help to make something. I am too independent to ask someone to teach me, so I learn by trial and error, often more error. I just like having a place to keep track of all the things I make, and my progression. This is my first time being featured, and I am pretty excited about it, Thanks Amanda for giving me a chance, and for always helping me find more inspiration


Car Seat Cover/Nursing Cover Tutorial
Car Seat cover

add a strap
Nursing Cover

You will need: one yard of front fabric (I used cotton quilting fabric)
one yard of back fabric (I used Chenille)
scraps of wool felt-optional (for flower)
Velcro (the sew on kind, not the sticky kind, it will gunk up your machine)
basic sewing tools (thread, scissors, pins, etc)

Cut both pieces about 35 inches wide, give or take (forgive me, I decided to do the tutorial after finishing, so all my pictures are of the finished product, not during the process)


and about 43 inches long

using a bowl, plate, or something round, round the edges of your fabric
sew the flower on.  I used leftover felt from this and followed to same general steps, just making it smaller


then sew the two pieces together, wrong sides together, leaving a space for turning
turn right sides out and top stitch (I did three rounds of top stitch, because I liked the look of it.  You could do one or two)


now make the straps for attaching to the car seat

I sewed to rectangles of chenille together measuring about 3.5" by 7.5".  I sewed them right sides together, then turned them right side out and top stitched.  I repeated for the second strap.


Then I sewed Velcro on, so it could wrap around the car seat handle.  Make sure you place the Velcro on opposite sides, so it can wrap flat

it will Velcro closed like this

Then I sewed the straps on (I did two seams down the center to attach each strap)

if you enlarge this picture, you will see the straps are about 13" down from the top
and about 21 inches up from the bottom (yours do not have to be exact)

place them about 10" in on either side

and about 8 inches apart

now make the strap, for the nursing cover


I sewed two rectangles right sides together, measuring 25.5"x3.5" and turned them right sides out.  Then I top stitched around

now you are done

if you feel inclined, embellish a cute burp cloth to go with it (I just used scrap fabric, some leftover lace hem tape, and some lace.  The lace came on a spool and so it already had a tendency to roll.  I just stared a circle on the outside, and rolled it in to the center)
Did you know that  My Vinyl Designer offers FREE downloads of some of their designs?  Go check them out!!
My Vinyl Designer Modern Art for the Home

Friday, April 29, 2011

The Royal Wedding

Features of a different sort today....

So some people are laughing at me.  But I really want a hat.  Really want a hat.  We're pretty boring -- I'd probably end up wearing it to the grocery store. 

But I would.  I would wear it down the cereal aisle with pride.  While matching up my coupons.


Because that is royal.


Royal Wedding Arrivals
Princess Beatrice and Princess Eugenie
I got the photo here
Now I admit that some hats might seem more extreme.  But I will say -- I like the blue color.  And I like her coat. 
Princess Osborne
Picture from here
I'm kind of a freak for feathers right now.  I think that this one would do well down the Kroger aisles.


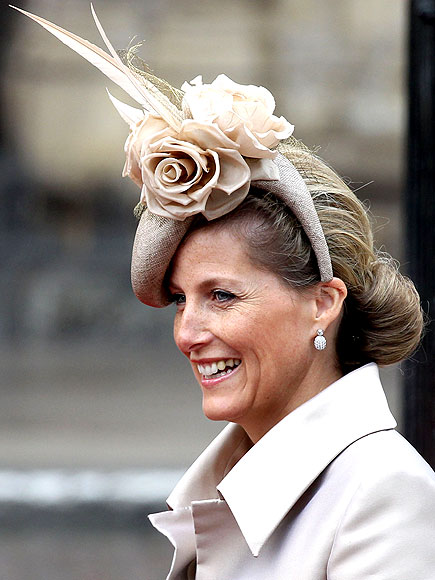
Sophie, Countess of Wessex
Picture from here
Love it.  Love it. 

Lady Frederick of Windsor
Picture from here
This one is slightly more "cruise ship" than Royal Wedding in my opinion. But Lady Frederick pulled it off nicely.  She makes it look classy.

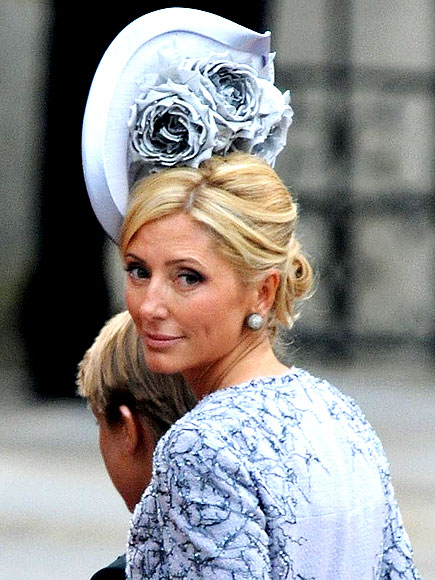
Princess Marie-Chantal's hat
Photo from here
I think this hat is great.  The color is gorgeous. I love the flowers.  It looks very British.

Kate is a hat lover too.
I got the photo here
Andy said it looked like one of those old satellite dishes, but I like it :)


I got the photo here
One of my favorites.  So pretty.  So classic. 


I got the photo here
Really?  I'd smile too.  Told you - I'm a sucker for feathers.

So million dollar question.  If I was in line at the grocery store and you saw me wearing one of these hats would you laugh? 

I loved the wedding.  I loved the dress.  I actually just love Kate's (or are we supposed to call her Catherine now?) style.  I hope she brings back the classic styles.  The clean lines.  So classy.  I need a long coat, pearls and a hat. 


Tomorrow is the Blogger of the Month Link Party at Today's Top 20.  Come link up your best project that you made in April.  Prize will be donated by the fabulous ladies of My Vinyl Designer !!  Right now they are offering 25% off every order until the end of April!  HOW AWESOME!

My Vinyl Designer Modern Art for the Home

Tuesday, April 26, 2011

Blog Updates

I hope everyone has had a wonderful Easter weekend!  We sure did!  Just a few quick things!
{I wanted a picture next to the flowers - he was mad because the grass was wet.}


First - Have you heard of BlogFrog?  It's an awesome site that allows everyone to connect in communities.  Think facebook ... but in groups.  I started a group called Do It Yourself.  I'd love for you to join!  There is an open forum - start discussions, meet other people, share ideas!  I'd love to start monthly "creative meetings" (a.k.a. live chats) once we get enough members! {Click here or over on the right to join - and of course, it's free!}

 
Second - Blogger of the month party is coming up over at Today's Top 20My Vinyl Designer is donating yet another awesome prize!  You should really go check them out because - well - they rock.
My Vinyl Designer Modern Art for the Home

ANNND

Third - I'm really trying to evaluate myself as a blogger.  And make sure that as my blog(s) grow that I am keeping them going in the direction that I'd like.  I started blogging so that I could inspire, be inspired and make friends who understood my excitement over things like burlap, printable fabric (ok, just fabric in general) and decorating for such holidays like Talk Like A Pirate Day (oh yes, it's a biggie in our house). 
With that said -- please join me on Twitter, email me, join the Do It Yourself Community, if you live in the Indianapolis area let's do lunch.  We don't need a blog conference to all get together! :) {Although -- I can't wait to go to one!}

Pillowcase to Tote Bag

(This was originally posted on A Vision To Remember! But I had to show you guys!) 

I'm always finding cool pillowcases at the thrift shop and Goodwill.  And for 50 cents why not pick them up!? 

My son loves Mario.  So when I found this pillowcase it was a no brainer. 

If your son is like mine, then he's on the go -- a lot!  Grandma & Grandpas, friends house, other Grandma & Grandpas, in the car ... go go go! 
Time for a tote bag! 
And pillowcases make it SO quick (about 15 minutes) and EASY!!!

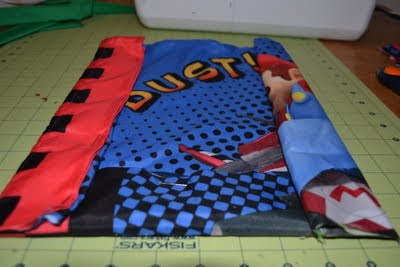
First make your straps.  I cut mine about 24 inches long and 4 inches wide.  You will need 2!


To make the straps fold over one edge to the half way mark and pin. 
Repeat on the other side.  Then fold in half and sew together. 

Figure out which side you want facing and which to be lining.  I chose to have Mario on the inside due to where the fold is.  Plus, we like green so Luigi wins. :)


I cut about 3 1/2 inches off the bottom since this was going to be a child size bag.  Then you cut a small square in each corner. 

{Can you believe it?  That's ALL the cutting!}

Pin the side and bottom.  Leave the top and the square cut outs unpinned.
To place straps, fold the bottom and the sides in.

Pin your straps on giving about an inch to sew securely.  Then flip and pin on the other strap so they are nice and even.
Sew around your pinned edges.  You will want to use a zig zag stitch to make it super secure.

Now you just have the corners.  Pull the inside corners to make a flat base - match up your zig zag stitch that you have done.  Stitch with a zig zag.

Flip right side out.  And your done! {We take Yoshi everywhere!}

Nothing like getting your picture taken first thing in the morning!! {P.S.  You like his Pj's?  Daddy let him pick out jammies last night -- out of my Goodwill pile!! Did he not notice how small that shirt was?! }

Just focus on the bag! :)  Someone is getting a haircut! TODAY!


He really does love the bag.  And I'm happy that it is the perfect size for him to carry his own stuff!  {And I just can't get over this pj/hair situation...lol}