Showing posts with label blankets. Show all posts

Friday, April 22, 2011

Flower Rag Quilt Blanket

I am so excited to be here today! I am the author of A Vision to Remember. I also have my own etsy shop, where I sell many of my creations. I am a stay at home mom of 2 awesome girls and one dog. They are my inspiration for sure. Everything that I have made has been for them in some way.

Here are a couple of things that I have made over at my blog:

I love making rag quilts. I sell many in my etsy shop, but this pattern is available for download on my blog here.


This was a fun pleated headband that I made for myself (one of the few times that I craft for myself, if you know what I mean :)


I also made this fun Ribbon skirt for my daughter (Part 1, Part 2)

I also have many other tutorials on my blog. Make sure to stop by and check them out.


I also have my own Etsy shop. There I sell rag quilts, car seat tents, and lots of patterns. Some of the patterns I sell are rag quilts, belly band, and fabric flowers.


Thanks again for swapping blogs with me and make sure to stop by tomorrow and link up to Check ME Out Saturday Link Party Have a great day!

Monday, March 21, 2011

Ballerina Blanket Tutorial

One great thing about blogging is meeting new friends.  Stephanie from Full of Great Ideas is such a sweet gal and super creative.  You def. have to check out her blog!  I love it!  And I love this blanket she made.  It's so super sweet!  Thanks for sharing today Stephanie!! :)

My daughter was invited to her best friend's 8th birthday party. Her friend is an amazing ballerina and my daughter really wanted to make her a blanket with a ballerina on it. I knew there was no way I could make a ballerina but I came up with an idea that I am very proud of and I think is absolutely beautiful.

I used the same technique as my personalized fleece blankets to make this. I purchased the large deep pink coral fleece blanket (double bed size) and 1yard of tulle. I had black felt, pink fleece, pink ribbon, Velcro circles and thread in light pink, deep pink (to match the blanket) and black on hand. Total cost $5 for the blanket (on clearance) and $6 for the tulle.

I started by printing off some images of a tutu and body form to be inspired from. I first cut out of black felt the bust of the body form, then the post and the feet. Make sure to prewash the felt because the color can transfer.
Once I was happy with the dress form, I used that as the shape to cut the bodysuit. I didn't want the top to be too low cut since this is a gift for an 8 year old girl so I made just a small 'v' shape. I used a wide light pink ribbon (same as the slippers) to make straps on the shoulder.

I decided to remove the black felt from behind the bodysuit so that it was quicker to sew. This is optional.
I placed all the pieces on the blanket to determine where I wanted the exactly. I then lightly glued the fabric down onto the blanket using a fabric glue that dries clear. I start with the black pieces first by pulling one side back and gluing it. This allows you to glue it down without having to move the entire piece.
 
Once this was drying, I started to work on the ballet slippers. For these I simply printed off a clip art image that was resized (approximately 7 1/2 long) to be in proportion to the bodysuit . I then cut out the shape of the slippers in light pink fleece and sewed a straight stitch over the inner lines to make it look like it had an opening for a foot.
 I ripped off the paper and did a tight zig-zag stitch over the straight stitch to create a bold accent line.
 
 
I cut two pieces of ribbon to the length I wanted to make the ties for the slippers (I lightly heated the ends of the ribbon so they would not fray). I glued the ribbons and slippers on the blanket.

I create the girl's name in a Word file using a font that I like. I print off the letters and then cut them out of the light pink fleece. I glue these down in the exact spot I wanted them.

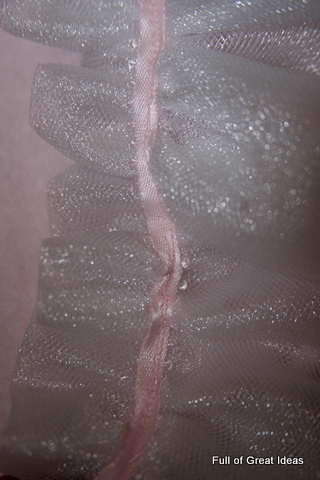
Next I focused on the tutu. I had 1 yard of tulle so I folded it in half length wise and did a basting stitch along the fold.
Pulling one tread from either end I gathered the tulle until it was the width of the waist of the dress. I then sewed a ribbon across the basting stitch to secure it.
Once the glue was dry, I did a zig-zag stitch around the dress form, name and the bodysuit. I always use the exact color of the blanket for the bobbin thread and match the upper thread with what I am sewing. I find this makes both the front and back of the blanket look nice.
(Back of fabric with matching thread.)
I attached the tutu to the dress with small Velcro circles. I thought it would be best that this could be removed for washing. Not 100% necessary but a nice to have.
One last look. Wow... I can't tell you how happy I am with this. Let's hope she loves it too :)

Told you!  Love it huh?  A-stinking-dorable.

Make sure to check out My Vinyl Designer for all your vinyl needs -- or just browse their massive project list for ideas!  You will find something you love! 


Monday, February 14, 2011

Blanket Tutorial

So this week I wanted to do a blanket! I made it about a week ago.  And I went to upload my pictures and <duh>.  I had to erase them when I put my memory card in....

<cue cheesy game show music>

my BRAND..... NEW.....CAMERA. {Crowd cheers.  Or at least I do.}

Yup.  Happy Valentine's Day!  Andy got me a Nikon D3100.  And I love it.

So it's a good thing it's as basic as basic gets.  Maybe just something you wouldn't have thought of to do.

Is that a table cloth?  Why yes it is.

And all you do is take a table cloth (I got this one at Target for about $4 on clearance.  The thicker ones work best!)

Lay it out right side up.  Take a piece of fabric (I used 1 yard of fleece...I stocked up when Joann's had it for $3 a yard!!) pin it together.  Sew leaving a small opening.  Trim your corners.  Flip and sew it up.

Sound boring?  No way!  This is perfect for storing in your car.  Put the tablecloth side down when you take the kids to the park.  Your blanket won't get all muddy.

Do your kids play sports?  Well, it always seems to drizzle when it's game day.  Put the fleece side down to keep you warm and when the rain hits the tablecloth side it keeps you dry!

Kids having a sleepover and want to eat in the living room in front of the TV?  Put this down tablecloth side up!  No juice spilling on your carpet.  Wipes right off. 

MACHINE WASHABLE (make sure you check your tablecloth package to double check!)

I love these blankets!

Remember to check out My Vinyl Designer for all the latest in Vinyl! :)

Monday, February 7, 2011

Guest Post : Dressing Heidi Sage

I can't believe we are starting month 2 of blanket tutorials!! WOW! The gals from Dressing Heidi Sage are just adorable.  It's a whole family event - - which I love.  And wait til you see their little blanket.  I love the pocket.  Well...can I even call it a pocket?  It's the cutest pocket ever.  Read on!  You'll see!  Thanks gals for sharing!! :)

Hey, this is Courtney from Dressing Heidi Sage.  We're a blog of all things cute for kids.  With my kids as inspiration, Deborah (my mom), Chelsea (my sister) and I, find ourselves busy crafting for and with kids...while all being hundreds of miles apart.  This particular tutorial is for a blanket Deborah made for Heidi Sage.  Not only is it adorable and cozy, it's also a blanket any skill level can make!  We hope you find the tutorial easy to follow and we would love to see you make one for Gabe's Gift.  As you read through the tutorial, remember this could very easily be changed into a blanket for a boy or even gender neutral.  It's all in the details.  So without further ado, I'll hand it over to Deborah...


Heidi Sage has already started to pre-school, and her school requires a blanket for nap time. I received a phone call from her mother this summer with an order for one blanket with Heidi Sage's name, dimensions of the blanket needed to be 3 foot by 4 foot, and it should be double sided for warmth....oh, and she wanted it red to match her school bag and bedroom. (Her mother is only slightly particular!)


So, I started thinking of different ways to make Heidi Sage's blanket. I decided it would need some flowers to make sure it was girly and later in the project I decided to add a purse and high heel to make sure it was REALLY girly. The purse was also to serve a purpose, but I'll get to that in a bit.


I used fleece for the blanket and also for the appliques. Little ones tend to love how soft and cozy fleece is. I first made some simple paper flower patterns and cut my flowers from different colors of fleece.


All the appliques were sewed on by hand. I used embroidery thread to sew on my appliques. I used the six strand thread and divided it into three strands. I used a blanket stitch for attaching each of the appliques. I sewed on the flower centers first before attaching the flowers to the blanket.  Click here for a quick video on how to do a blanket stitch!


I monogrammed Heidi Sage's name in one corner and added some flowers around her name. If you don't have a monogramming machine and you want it personalized, you can always just leave space and then take it to a local sewing store, boutique, or other shop that has a machine. Make sure to shop around. You can find people who will do it out of their house for as cheap as $5/piece...and others who are really proud of their ability to push buttons and center things!


On the opposite corner I decided to add THE purse. Our Heidi Sage doesn't go more than five minutes without a pacie in her mouth, and she sure never takes a nap without one. So, in order to make sure she always had one for nap time, the blanket was made to hold extra pacies. And I added a shoe just for fun. A girl can never have to many shoes in our family! I found a simple purse pattern online and attached the flap onto the purse so it could open and close.


After all the appliques were finished I added the back piece of fabric and used the sewing machine to sew the two pieces together.


Courtney has reported the blanket gets softer and cozier with every washing!
NOTE: This could also easily be for a boy just by finding some simple dinosaur or truck patterns. The possibilities are many....the cuteness is endless!


Stay warm!
--
The Girls at Dressing Heidi Sage
dressingheidisage.blogspot.com

Monday, January 24, 2011

Guest Post: Tea Rose Home and her Swaddle Blanket

I just love Tea Rose Home.  Sachiko is seriously talented!  And I was so excited she agreed to post today! :) You have to check out her blog.  Everything she makes turns out amazing!!

Hi everyone! I am Sachiko from Tea Rose Home. On my blog I share sewing, quilting, repurposing ideas (and don't miss the free tutorials!) and sometimes yummy recipes too. I host link parties every Wednesday. If you love to see what people are working on and want to be inspired, come visit me and join the fun!

Amanda asked me to be a guest blogger for her blog, and I am totally honored to be here. Thank you for inviting me Amanda!

Today, I am sharing a tutorial for a self binding method to make swaddle blankets. I hope you will enjoy it!

I have made so many blankets in the past. I think this is one of the most easiest ways to make baby blankets. It might be a little confusing at first, folding the corner, but once you get used to it, you can finish a blanket in no time!


{You will need}

1- 43" X 43" flannel (It was 44" wide flannel, I cut off the sides to get rid of the writings and thickness. This fabric will be the outer border.)

1- 36" X 36" flannel

Matching thread

{How to}

1. Mark the middle for all sides for both fabrics. Lay them together with right sides together. First, pin the middle of the four sides. Then pin the edges starting in the middle make your way outwards to the corners.


2. Start sewing using 1/4" seam allowance. Remember to leave a 5" opening for you to turn the fabric inside out later.


3. Fold the corner. Draw a line to help you to know where to sew. Use the picture as a guide.


4. Cut the excess off. Repeat the process for the other corners.


5. Press the seam towards the outside with an iron.


6. Turn the fabric inside out. Iron. Pin the opening and top stitch all around the blanket.


7. Ta-da. That's it!


Wasn't that fun? I have been going through my stash and made some in the past few weeks. They always come in handy for baby showers and such. I hope you enjoyed the tutorial!

Monday, January 17, 2011

Blanket Tutorial: Kojo Designs!

I love Kojo Designs blog!  They are two amazingly creative ladies!  And they have a pretty incredible Etsy shop too!
personalized stationery- custom bicycle thank you notes
I know the perfect guy who would love this!

And they have Kojo Baby with the cutest little outfits.

But Kristin and Jordan really don't need an introduction - they're sewing superstars!  And I'm so excited that they agreed to share their famous Anthro Blanket tutorial!!  Thank you girls! 

Before we get started piecing a PILE of knotted squares together, do you want the backstory on this little Anthro-inspired gem?

First, you should know that I'm a bedding junkie. I LOVE wandering through Pottery Barn, Restoration Hardware, Crate and Barrel, Anthropologie (at Park Meadows  in Denver, those stores are all conveniently located near each other as well) to see their bedroom displays. My ever-changing bedding crushes are a constant around here.

So a few years ago, I found this Thai Silk Bedding at Restoration Hardware and fell in love. I have a bad habit of loving expensive things, and this was no exception. We were still in the dual-income-no-kids category at that time and so Adam surprised me with the dream-bedding. *Note, I tried to find a picture for you, but turns out five year old bedding isn't very popular in google images. ;)

Fast forward to this fall when my oh-so-beautiful Thai Silk Bedding RIPPED. Yep, you read right... it was destroyed, not functional and, worse, not fixable! Since the era of able-to-splurge-on-bedding-we-love is long gone, just replacing the duvet cover is not exactly an option anymore.
But then, of course, I went and fell in love with the rosette bedding at Anthropologie. It shares all sorts of things with my Thai Silk Bedding... it's beautiful, and lovely, and totally out of our price range. Isn't that how things go?

When I saw the rosette bedding at Anthro, I had this idea in the back of my mind that perhaps I could try to make my own vision of knots and loveliness... but shelved it to pursue more immediately important matters (like tending to a new born baby, and creating things for sytyc, and getting ready for the parties I was throwing, and trying to stay somewhat on top of normal life). And then we made it to the Wild Card finale for So You Think You're Crafty. What better chance to try out my crazy bedding-making idea?

And thus the Anthro-Inspired Knotted Bedding was born. Thank you, So You Think You're Crafty, for giving me a chance to attempt something I might not have otherwise. My husband thanks you too. Because instead of spending $400+ on the quilt at Anthropologie (or, more likely, settling for something we didn't love nearly as much), I made this little getup for around $30. Glory, sheer glory.

Ok, now onto the tutorial. :)

To put your 'quilt' together, you'll need:
-56 knotted squares from part 1 (for a king sized quilt)
-a king sized duvet (I got the thinnest one I could find at Ikea... it was $29... fabulous!)
-sewing machine and supplies
-TONS of pins
1. Start by piecing one row of squares together at a time. Your finished product will have eight rows of seven squares. Here's the thing- in order to achieve that wonderful, gathered look, you have to create the gathers as you go. I did this by pinning little pleats in place before sewing squares together. To be more specific, I pinned five pleats along the length of each square (one tip- if you pleat both squares and pin, this will go more quickly). So, pleat, pin (right sides together) and sew.
2. Repeat and repeat and repeat until you have eight rows of seven knotted squares.
3. Now, you're going to sew the rows together to make a big square-ish mass of knotted squares. It was easiest for me to pin first where the edges between squares met up and then pin more pleats in place. Remember, every time you sew two squares together, you have to 'create' little gathers. As you're sewing the rows together, this means that you have a lot of pinning to do before you sew. Also, be sure to pin the sides right sides together. When you're finished you'll have the top part of your 'quilt.'

4. Lay out your duvet. Place your quilt with the right side (the side with all of the knots) facing down on top of the duvet. Be sure to match so that the longer side of the duvet is lined up with the row of eight squares and the shorter side of the duvet is lined up with seven squares.

Pin all the way around the edges, again, pinning pleats in place. Lucky for me, my duvet was divided into seven sections that matched up with my squares, so that was a good guideline on the short edge to make sure I was pinning evenly. On the long edges, I folded my duvet in half and marked where the middle would fall then folded it in half again and marked the quarters (on both long edges). This became my guide for even pinning on those edges.

Sew around the entire perimeter, leaving one square open. Pull the duvet through the one open square, turning the whole thing right side in. Sew your one square opening shut.

*Note- I can't say this enough, go over the ENTIRE quilt and make sure you got all of your pins out. Once you sew this baby shut, you don't want little pins pricking you. And they like to hide in the pleats, so check thoroughly!
5. Fluff your almost quilt. It almost looks right, doesn't it? Almost done! Now you're going to pin your rows in place and 'stitch in the ditch' (I followed this tutorial on youtube- haha!) so that your squares stay put and don't shift all over the place. I sewed down every other row, but feel free to do as many as you please.
 6. Can you believe it? You're done! Put this vision of loveliness on your bed and admire!

I am working on shams... I'll put a tutorial together when I get those done! Also, if you're looking for part 1, it's here.